Property Viewing Checklist: Smarter Real Estate Inspections for Global Buyers
Buying property in another country involves more than admiring high-rise views or liking a clean finish. From a modern apartment in Singapore to a family home in Toronto, taking the time to inspect each property properly is a step buyers shouldn’t skip. A detailed checklist brings focus to the process, saving you from hidden issues and regrets.
Whether you’re looking to live, invest, or lease, physical visits supported by careful documentation help keep emotions in check and highlight the reality behind the marketing gloss.
What You Can’t Afford to Overlook
It’s easy to get impressed by shiny kitchen counters or wide balconies. But minor problems like cracked tiles, faulty plumbing, or unclear boundaries often stay out of sight during brief visits. Without a list to guide you, one could miss key structural or financial red flags.
Checklists also allow better comparisons between properties. You get to weigh up units side-by-side using the same standards. That makes it easier to negotiate prices or walk away when a property doesn’t meet your baseline expectations.
Prepare Well Before the Visit
Know the Area
Start by researching the property’s surroundings. Check how close it is to public transport, major roads, or community centers. Search for flood records, land zoning history, and future infrastructure plans. Local council websites usually have useful insights.
Bring the Right Tools
Pack a flashlight, level tool, moisture meter (especially for older properties), portable charger, and a notepad or app for quick note-taking. A tape measure can also help if you’re thinking of buying furniture before moving in.
Schedule Properly
Don’t rush. Spend at least 45 minutes per visit. If possible, come back at a different time of day to see how sunlight hits the windows or if nearby noise is a concern. Schedule viewings during both weekday and weekend hours if you’re planning to live there full time.
Make a Question List
Be clear on what you want to know. Ask about the last major renovation. Confirm the title type—whether it’s freehold, leasehold, or shared ownership. Find out if zoning changes are expected or if any permits are pending approval.
What to Inspect During the Visit
When you arrive at the property, stay calm and observe step-by-step. Don’t let the scent of air fresheners or fresh paint distract you.
Exterior Details
Check the paintwork, cracks on outer walls, roof condition, and drainage system. If there’s a driveway, observe for water puddles or signs of poor leveling. Ask about the condition and cost-sharing for common areas like shared gardens or walkways.
Inside the Unit
Test the floor for any sinking spots. Open windows and check for drafts or difficulty locking. Run the taps and showers—note how long it takes for hot water to come out and whether there’s consistent pressure.
Turn all the lights on to check electrical wiring. Flush toilets and see how fast water drains. Look behind doors, under sinks, and near ceiling corners for signs of mold, stains, or poor sealing.
Verify Documents
Request the past three years of property tax receipts. Ask for copies of strata regulations if it’s a condominium. If energy performance ratings are required by law in the region, request the latest one. Also check for occupancy permits or recent inspection certificates.
Fire and Security Readiness
Especially for buildings in urban centers like Dubai, Tokyo, or New York, fire safety matters. Ask to see the fire exits, emergency lighting, sprinkler system, and security cameras in communal areas. If there’s a security guard, check their shift schedule or contact point.
After the Visit: Make It Count
Don’t rely on memory. As soon as you leave, go over your notes. Rate key elements like flooring, noise, air quality, and lighting. If you found a major issue, take a photo and attach it to your checklist.
Back home, review all properties you visited using one scoring system. This method keeps your decision focused and less affected by first impressions or agent persuasion. Consider consulting a structural engineer or building assessor for properties with large repair costs or older construction materials.
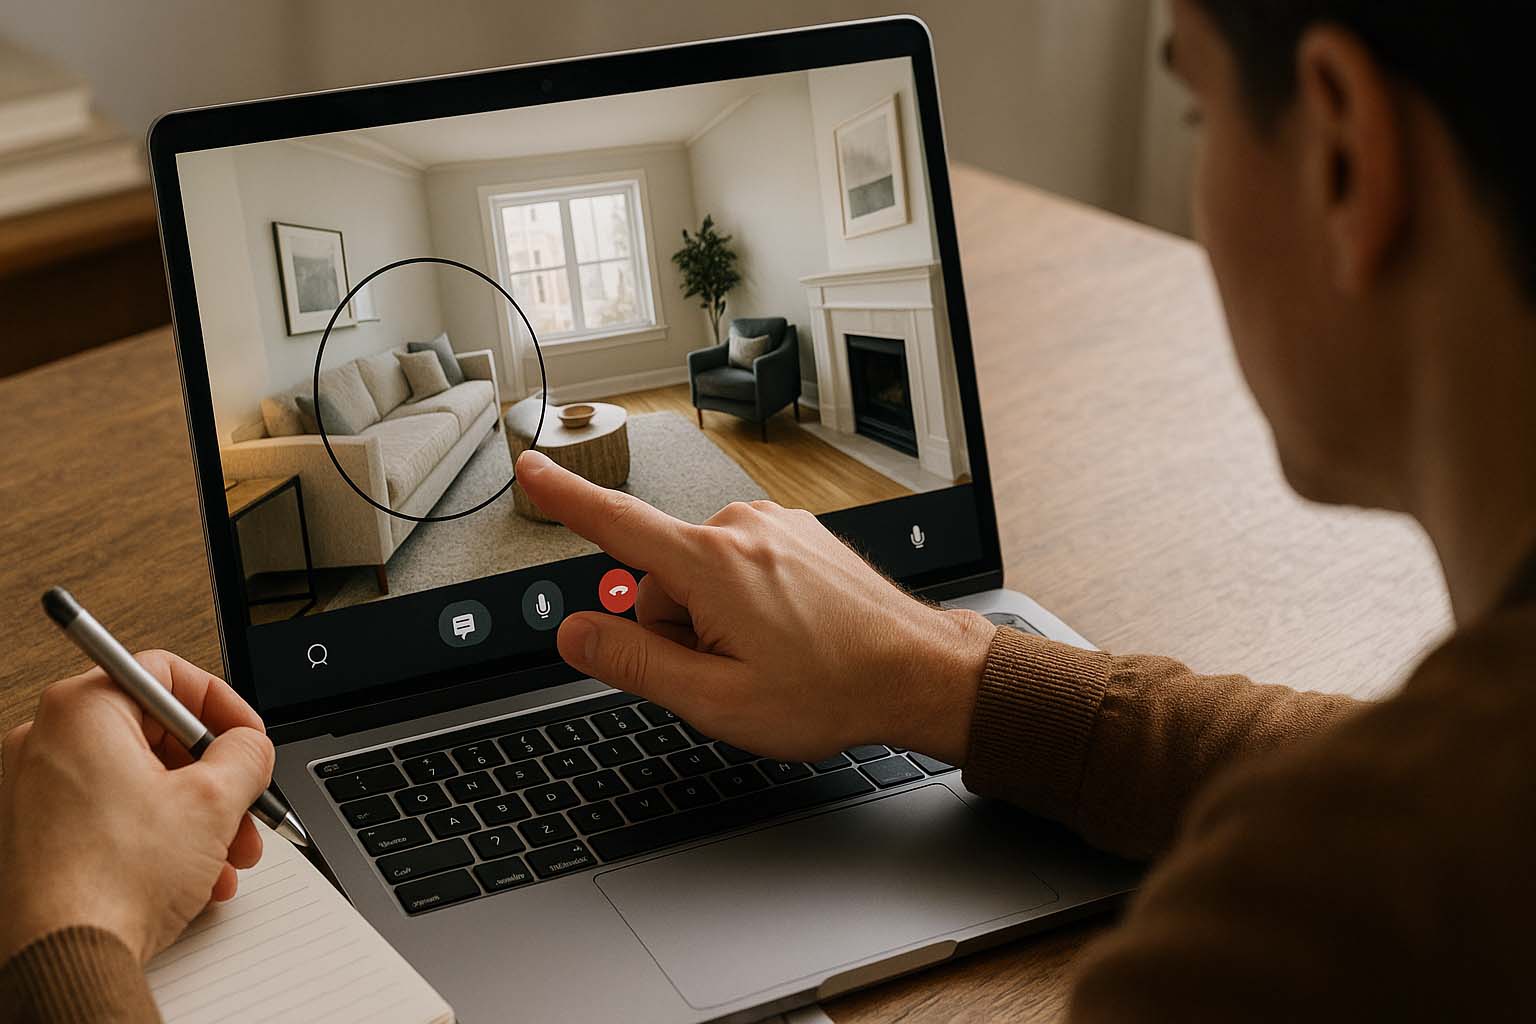
Virtual Inspections: A Modern Step
In cases where you can’t travel, virtual tours offer a helpful start. These can include 360-degree views or real-time walkthroughs with an agent.
Zoom in on ceilings and wall corners to spot moisture patches. Check for distortion in mirrors or windows, which may suggest video editing. Ask for an unscheduled live call to confirm problem areas or get a clearer sense of space.
Though useful, these digital inspections should not replace physical visits entirely. They’re more suited for narrowing down options or doing second-round reviews after shortlisting properties.
Emerging Global Standards That Affect Buyers
As countries raise standards on safety and sustainability, buyers need to check whether the home complies with local codes. In some areas of California, houses must meet new earthquake resistance laws. In Copenhagen and Berlin, governments regulate maximum rental prices. This influences property value over time.
Ask if the home includes smart meters or provisions for solar energy. For locations where green zoning is being enforced, find out if the property already meets the criteria. While these features don’t always add instant value, they help reduce long-term bills and strengthen your resale position.
Make Your Own Checklist
Online templates are only starting points. You’ll get better results if your checklist fits your goals. If you’re investing, include estimated rental income, vacancy rate, and demand in the area. If you’re moving in with children, look for nearby schools, open play spaces, and access to clinics.
Organize your checklist by categories—external, internal, documents, and utilities. Print it and attach it to a clipboard. Use the same format for every viewing. This makes each visit feel more professional, and sellers often respond better when they see you’re informed.
Take Control of the Process
Property hunting involves effort, and every detail counts. A checklist makes you more confident and clear-eyed. Agents tend to be more transparent when they know you’re asking smart questions. You get treated more seriously, and the process becomes less stressful.
Even if you don’t find your ideal home on the first few visits, using the same method each time helps you learn. You’ll start noticing patterns and gaining sharper instincts.
Final Note
No matter where in the world you plan to buy, preparation is your best protection. A detailed checklist can steer you toward better deals and more reliable homes. It helps you filter through the noise, focus on facts, and make decisions you can stand by long after moving in.
From viewing rooftop views to checking basement smells, each small action matters. Treat every step with care, and your investment will reward you—not only in returns but in peace of mind.